How do I setup a webhook to run my workflow?
Webhooks - what are they?
In simple terms, there are two main ways in which applications on the web communicate and share information - either by polling or using webhooks.
Polling refers to one application periodically asking another if something happened. This requires a scheduler and can be inefficient as there may not be any updates in the requested period. Webhook on the other hand refers to one application sending information to another when something happens, essentially near real-time callbacks/notifications of changes.
Simplified Example: Keeping inventory levels in sync between online shop and warehouse system.
- Polling/Schedule: Online store asks warehouse system every 10 minutes if there are any stock updates.
- Webhook: Warehouse system sends notification to online store every time there is an update to stock levels in the warehouse.
Spojit platform allows you to generate a unique webhook URL for an workflow which can then be entered into a 3rd party system (ie. the Warehouse system from the example above) so that every time there is an update in the warehouse, the warehouse app sends info to the provided URL which in turn starts your integration.
Instructions
1. Log in to your account
2. Access 'My Workflows' page
You can access the page via the main menu by expanding the 'Workflows' menu item and selecting 'My Workflows'. You should see a table listing all your workflows here.

3. Enter 'Edit Workflow' page
Enter the Edit workflow screen by clicking on the blue ‘workflow’ icon button at the end of a table row. Switch to 'Webhook' tab.
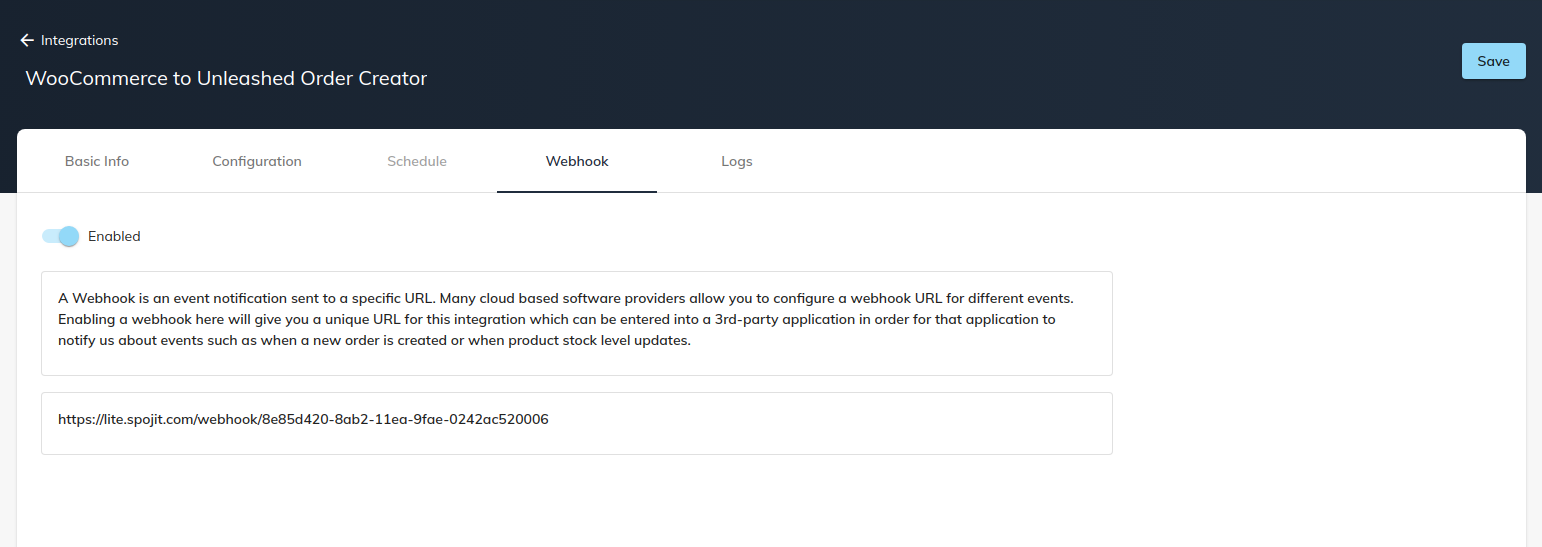
4. Enable webhook, note URL
Enable webhook by switching the ‘Enabled’ toggle at the top of the page. This will generate a unique URL for your workflow which you can enter into 3rd party system.

5. Save changes
Don't forget to save your changes. The ‘Save’ button can be found in the header of the Edit workflow screen (top right corner).