How do I setup a schedule to run my workflow?
Schedule info
Spojit platform supports two types of schedules:
- Periodic: allows you to set an workflow to run in specified intervals (every X minutes or hours)
- Time based: allows you to set an workflow to run once per day at specified time
Schedule starting point: Each schedule requires you to specify a schedule activation start date and time ('Activate On' field). This can be set to any future date/time and indicates the starting point of the schedule.
Time awareness: Periodic schedule is time aware which means if you set your schedule to start at 5:55 am running every 1 hour, the workflow will run at 5:55 am, 6:55 am, etc. The same schedule running every 7 minutes would run at 5:55 am, 6:02 am, 6:09 am etc.
Locale awareness: The date and time you enter into your scheduler is in the time zone of your account. You can change the time zone in My Account settings, ‘Preferences’ tab.
Instructions
1. Log in to your account
2. Access 'My Workflows' page
You can access the page via the main menu by expanding the 'Workflows' menu item and selecting 'My Workflows'. You should see a table listing all your workflows here.

3. Enter 'Edit Workflow' page
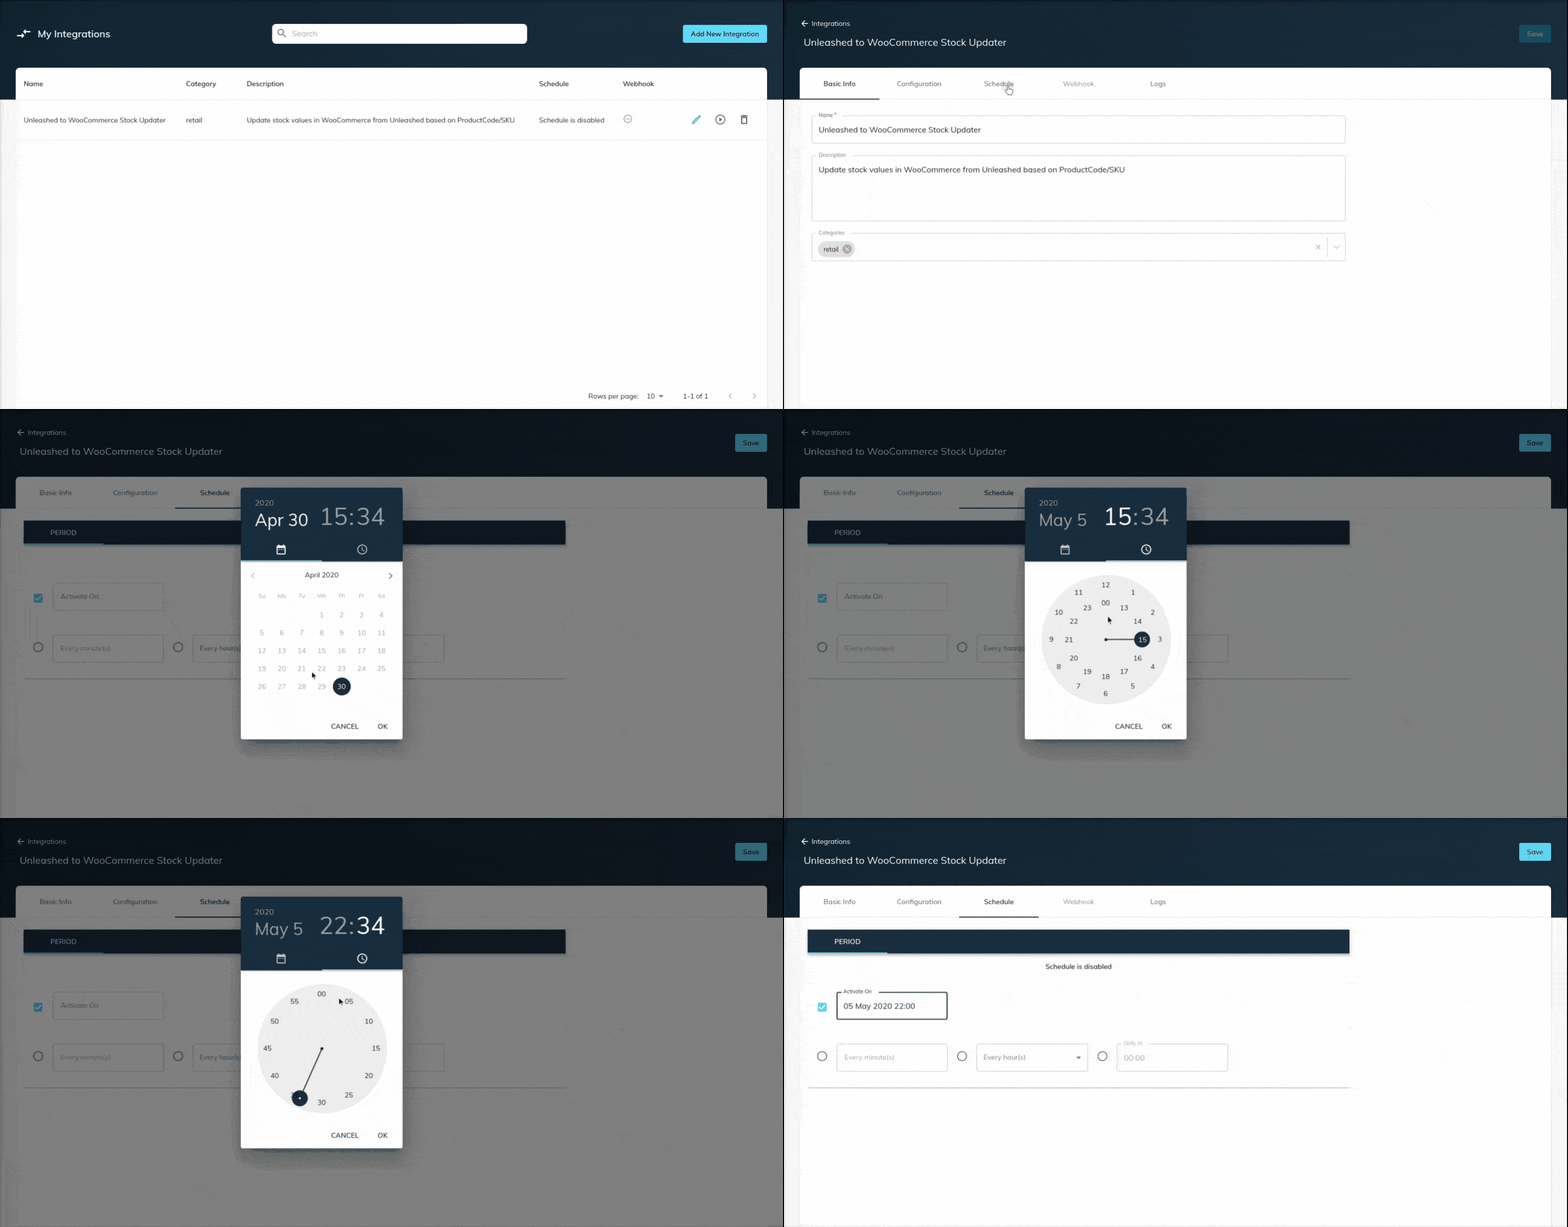
Enter the Edit Workflow screen by clicking on the blue ‘workflow’ icon button at the end of a table row. Switch to 'Schedule' tab.
4. Activate schedule and set initial date/time
Tick the checkbox next to Activate on field and set the ‘Activate on’ date and time. The 'Activate On' date and time specifies the starting point of the workflow schedule - from this date/time, the scheduler will be automatically running the workflow as per the schedule specified (periodically, or daily at specified time)

5. Set recurrence
Select your preferred schedule (period - every X minutes/hours OR daily at specified time) and configure.You can see a textual representation of the schedule as you continue configuring.

6. Save changes
Don't forget to save your changes. The ‘Save’ button can be found in the header of the Edit workflow screen (top right corner).